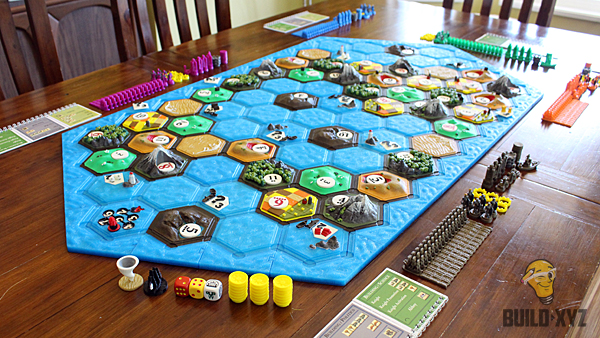
Upon first gaze of JAWong’s amazing original Catan tiles I knew I had to build a set of my own. This post serves as a build guide for those wishing to fabricate their own custom 3D version of the uber famous board game. Since JAWong’s contribution in 2012, many other talented designers have submitted stunning models to enhance and expand upon the 3D Catan collection.
The first thing to consider is what size game do you want to build? I often play six player setups consisting of “The Settlers of Catan” “Cities & Knights” and “Seafarers” expansions. When you add the 5-6 player expansions for each of these you end up with 6 retail boxes! Building the set shown here will allow you to play all of the smaller board variations as well, should you decide to play a more basic Settler’s game.
Designers have also developed the models for the “Traders & Barbarians” and “Explorers & Pirates” which won’t be covered here.
If you’re crazy enough about Catan to build a 3D set, you probably have some retail sets already. The Catan Shop does sell replacement cards if you are looking to purchase just the cards and print the rest. You still will need to account for the longest road and largest army cards, as well as the city development calendars which I have not seen sold separately.
All of the parts in this build are linked to the original Thingaverse “thing” but please comment if any links are found broken.
Materials
This set is made almost entirely of PLA with exception of some ABS I had laying around. Painting takes the most time by far so you should consider buying different base colors for each style of land hex and player sets. This would require only shading and detailing and make the pieces more durable.
You can also opt to save some money and purchase a few rolls of white and paint everything. I did use white for the lumber hexes because the design required so much details (see Painting section of this post)
I needed only one roll for every color with the exception of two transparent blue rolls for all the sea hexes.
The magnetic bases are very handy to keep the board stuck together. This was always a peeve of mine with original “cardboard Catan” game which the hexes are always moving around. The magnetic balls are 3mm spherical magnets. You can buy Bucky Balls but I decided to go the Ebay/China route as you will need 1458 magnets (81 tiles x 18 magnets/tile) and they are much more reasonable on eBay. The bases are made to press fit the magnets in. The magnets must freely rotate in order to re-orientate and attract neighboring hexes.
Hex Breakdown
Dakanzla has made major contributions to 3D Catan on Thingaverse. All of my hex tiles where included in this post.
| Settlers | Settlers 5-6 Player | SeaFarers | Seafarers 5-6 Playe | Cites & Knights | Cities & Knights 5-6 Player | Totals | |
|---|---|---|---|---|---|---|---|
| Mountain (Ore) | 3 | 2 | 2 | 0 | 0 | 0 | 7 |
| Forest (Lumber) | 4 | 2 | 1 | 0 | 0 | 0 | 7 |
| Field (Grain) | 4 | 2 | 1 | 0 | 0 | 0 | 7 |
| Hill (Brick) | 3 | 2 | 2 | 0 | 0 | 0 | 7 |
| Pasture (wool) | 4 | 2 | 1 | 0 | 0 | 0 | 7 |
| Gold | 0 | 0 | 2 | 2 | 0 | 0 | 4 |
| Dessert | 1 | 1 | 3 | 2 | 0 | 0 | 6 |
| Sea | 0 | 0 | 12 | 12* | 0 | 0 | 24 |
| Sea Harbour | 12** | 0 | 0 | 0 | 0 | 0 | 12 |
| 81 |
* The Gold tile in the original version have water on the reverse side so we make an additional 4 sea hexes
** The sea harbor hexes replace the original ports located on the frame in the base Settlers game. These sea harbors will also provide additional sea hexes.
The hexes were printed in the following base colors:
| Hex | Plastic Color |
|---|---|
| Mountain (Ore) | Grey |
| Forest (Lumber) | White |
| Field (Grain) | Yellow |
| Hill (Brick) | Light Brown |
| Pasture (wool) | Green |
| Gold | Bronze |
| Dessert | Light Brown |
| Sea | Transparent Blue |
Player Sets
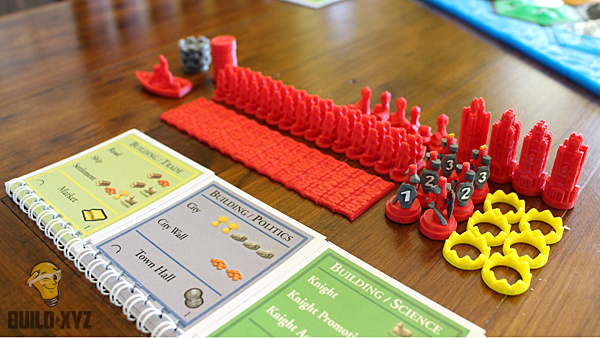
I made six player sets in Bronze, Red, Orange, Blue, Green, and Purple. These parts get handled to most so I avoided painting them with except of the knights. The knights have their strengths embossed on their shields which is hard to read if not painted. When detailing the knights. I opted for enamel model paints for added durability.
| Settlements | 5 |
| Cities | 4 |
| Roads | 15 |
| Ships | 15 |
| Basic Knights | 2 |
| Strong Knights | 2 |
| Mighty Knights | 2 |
| City Wall | 3 |
| Road Connections * | 9 |
| Merchant ** | 1 |
| Knight Activation Rings | 6 |
* Road connections – Not included with the original game and are entirely cosmetic. They fill the void between two adjacent roads.
** Merhcant – Each player now has a merchant piece in their color which makes tracking who currently has the merchant much more obvious. If the merchant cannot be placed on one of the 3D hexes (i.e. mountain), place the merchant in the included boat and park it next to the harbor you wish to trade at a 2:1 rate.
General Game Pieces
In addition to the board hex’s and player sets there is handful of printed parts to round out the set:
| Barbarian Sea hex | 1 |
| Barbarian ship | 1 |
| Metropolis* | 3 |
| Chits | 21 |
| Stacking card holder** | 13 |
| Harbors | 12 |
| Robber | 1 |
| Pirate Ship | 1 |
| Number Tokens | 56 |
| Border – Corner | 6 |
| Border – Straight | 22 |
* Metropolis – Printing the Metropolis in their respective colors (Green, Yellow, or Blue) eliminates the need for using marker to identify which player currently holds a given metropolis.
** Stacking Card Holders – Print an extra holder (13 in total) to hold the regular development cards from the base game. This will keep them handy should you decide to play just the base game. As shown the progress cards holders are printed to match their metropolis and the Defender of Catan holder is printed in Bronze. Don’t forget to print a lid!
Painting Tips
Inexpensive acrylic paint was used on the land hex tiles that can commonly be found in dollar stores. For painting tutorials, searching YouTube with searches like this is extremely helpful. Using a “wash” on the mountain hexes will give them some nice shading.
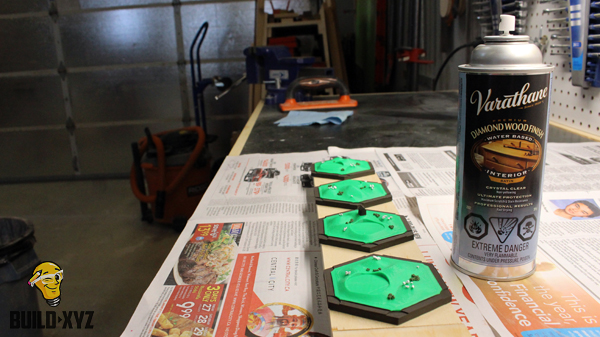
Water based Polyurethane in aerosol spray form is very easy to work with. Spray two light coats on all the painted land hexes to lock in the acrylic paint.
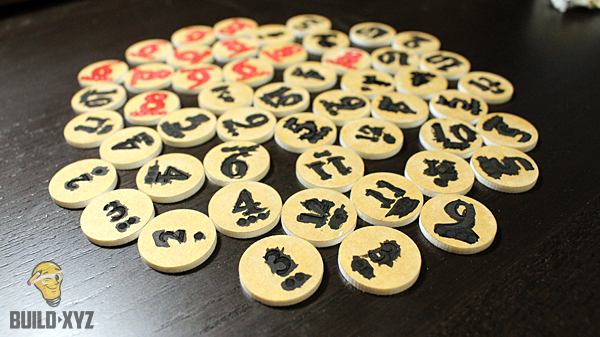
Though there are printable designs, these number tokens were cut on a laser cutter. If you are using my laser cut design, leave the protective film on as a mask and carelessly paint the numbers in. When cured just remove the film for a nice crisp line.
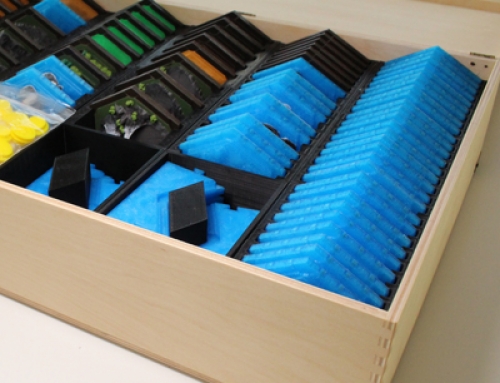
Thanks for checking out this build. In my next post I will be constructing a custom case hold and transport this set.







Hi,
Love your guide, this is exactly what I was planning out just a few days ago, and you’ve already done the work in a much better way than I could have, so thank you very much.
I did have a question, i was wondering if you could list the colors you used for your tiles. I was going through your pictures and such, and I can’t decide if i want to use a different green for the lumber and wool pieces or not.
Thanks again
Hi Dan, The post has been updated to include the filament I used for each type of land hex. The color is a link to the actual plastic I ordered! Happy building!
Thanks so much. You’ve gained a new avid reader. I’m gonna get started on mine tonight.
How much did this cost you to print? I dont have access to a printer and would have to order online… a estimate would be appreciated
It is Hard to give an estimate because I ordered approximately 12 x 2kg rolls but really only used 50-60% of that. I’m not familiar with having thing printed online so I’m not much help there. This was my first large project on my Prusa i3 kit printer.
Do you have an original Prusa or another model? Can you post a link to where you got yours from?
Hi Andrew, My 3D Printer began as a FolgerTech 2020 Prusa i3 and is almost completely rebuilt now with mods or aftermarket parts.
https://folgertech.com/products/folger-tech-reprap-2020-prusa-i3-full-aluminum-3d-printer-kit
Did you have any troubles when printing the sea tiles? I am using the same transparent blue filament and have tried several different print settings after the original failed, and each just doesn’t come out quite right.
Hmmm, your using PLA? What are the symptoms of your prints? There are a ton of good pictorial guides decicated to resolving print issues such as this one
I may have resolved the issue. The top kept coming out with holes and some other weird parts. The first thing we did was adjust the heat since we were on the low end of the recommended setting, and changing it helped a little bit. I then proceded to increase the bottom/top thickness and I believe that is the key to solving the issue. Other than that, this project is so cool and I can’t wait until it is all printed and ready to play!
Number tokens number correct? 18×3 is 54 where are the other 2 coming from?
How would I make the number tokens? It says “laser printer”, but I am unclear what that means. I am getting the same 3-D printer you have since it is a decent price right now on Amazon, but I am not clear what else I will need to do to get the number tokens as nice as yours.
Hi and sorry for the confusion. I have access to Epilog laser engraver/printer/cutter. There are 3D printed designs on Thingaverse if you do not have access to a lazer engraver.
Hi, how did you get/make the building cost sheets (with the flippy thing)??
Sorry those are from the original game
Hi, amazing job !!! I am finishing printing my Expansion and Extension kit.
I notice there is one extra dessert in the Seafarers Expansion.
Also, The player set table can be a little bit smaller so you don’t need to scroll. (or just edit the HTML)
Thantk a lot
I printing the tiles using my resin printer. The prints came out great, but the hole for the magnets are every so slightly better than the magnets themselves. So although they do go in, it doesn’t keep them from falling out. There is no mention of exactly how you deal with this. I’m assuming most prints are done using FDM printer which results in some warping/shrinkage that keeps the magnet balls in the holes?
I had about %5 of the magnetic balls falling out and just used scotch tape to hold those ones in, otherwise the press fit works very well on FDM printers.
On the magnets, Dakanzla updated his design to include tiny seats for the magnets to hold them in. But also on his main piece site on Thingiverse he’s linked a remix that uses interlocking puzzle pieces for the bases. I’ve decided to go that route as the magnets add an extra $20-$40 depending on type. Just trying to keep the cost low as my Son in Law requested this and insists on paying me for the cost. 🙂
Thanks for your work on this. A lot of printing ahead of me, but this gives me a clear idea what’s to print.
Awesome!, Thanks for sharing!
Can you put a link for the interlocking puzzle pieces for the bases I could not find it.
I have two different printers, resin and FDM. I have ben collecting designs and printing hexes and game pieces on both printers. I have invested in the printers and consumables as well as trial and error getting them to print. I would like to sell printing services to anyone interested and have lots of advice about many options. These designs are not mine and I am not licensed to sell the designs, I am simply selling consumables and printer time. Please reach out if you are interested in my services, just remember that it is not inexpensive unless you want to buy my “seconds” that will require a little more post processing on your part but completely playable. For a basic settlers set, 19 hexes and 12 sea hexes with harbors is going to be at least $200 depending on options it could be much more. Magnets for magnet bases are around $35, then there are player pieces, basic, C&K, Sea Farers adds knights and ships, more print times and consumables. Then Pirate Ship, barbarian counters, number tokens, robber, merchant, flip chart hex alternative, etc.. Good news it you could do it all a little at a time or negotiate a good complete deal all at once with advice from someone who has invested the time etc. to understand the options. mailto:gbayne@optonline.net
What material did you cut the number tokens out of?